| alfa 33 bespoke parts ONLY for sale, NOTHING ELSE, as car is being sold.
door cards (need re upholstering) door sheet metal speaker rings, for 6.5" 5.25" 4.5" ashtray for audiotec fischer urc.3 & 4 switches boot false floor |
|
| Always good to hear peoples opinions
It is not finished means; the doors aren't treated with sound deadening the eq tuning isn't the best should be running of a LFP battery sub enclosure not correct size interior surfaces not treated for reflections noise from running engine and exhaust is not ideal either |
|
| Regarding Alanâs massive stereo install, I have to admit Iâm not one for big stereo systems myself, and when Alan asked me to witness his when I met up with him recently I was quite prepared to be unimpressed with massive base that was going to hurt my ears, but I was hugely pleasantly surprised and genuinely impressed. What Alan has managed to do is in my humble opinion, completely redesign how the car speaker works, I was sitting in the driver seat. And I was well aware exactly where the speakers are in that car, but yet the sound seemed to emanate from the centre of the cabin, its second nature to look towards where the sound is coming from, and I kept looking into the middle of the car, but there is no speaker there, so I donât quite understand how Alan has managed to make the sound move like that, Iâve never witnessed that before. It was very crisp sound, and not at all âbase thumpingâ which I was expecting, it was perfect sound clarity and all of Alans description of the complicated install once is witness completely makes sense, also bear in mind that it isnât even finished yet, the result is incredible. | |
| continues here
https://www.alfaowner.com/threads/33-i-c-e.214655/page-16#post-17889938 |
|
| I'm in the process of making a floating amp rack, using 15mm frosted acrylic, edge lit by LED's, under the amps with 12mm square bar underneath, welded to uprights.
I am also trying to get some of these https://www.hyte.pro/product/m525.html open end. They will be soldered to the tweeters in the pods and connect to the mating side on the a pillar underneath the magnet for holding the tweeter pod, If they made them with stronger magnets I could have used them as the mounting of the pods, with a bit of rubber to stop them rotating. |
|
| continues here
https://www.alfaowner.com/threads/33-i-c-e.214655/page-6#post-3535094 I fitted and upgraded my system into my red 33 As it is now https://www.alfaowner.com/threads/33-i-c-e.214655/page-14#post-17791904 https://www.alfaowner.com/threads/33-i-c-e.214655/page-14#post-17796072 https://www.alfaowner.com/threads/33-i-c-e.214655/page-15#post-17800848 Much more practical, I can get to the spare wheel! Im trying to EQ but not having much luck, Using REW (Room EQ Wizard) with a mic and a laptop, so just using the auto tune from the DSP. |
|
| Going a different route now bud.
Turning my car into a lightweight beast so I will be ditching the sub in favor of a 3 way setup up front with 7 or 8" |
|
| Hows the ICE going son? pumping like no other dutch trucker | |
| Hi
The bumper mounts protrude into the boot a couple of inches and bolt on with some large bolts. What I mean is secure any extra brackets in the boot using these bumper mounting bolts. All the best Keith |
|
| Thanks again Keith for your comments, I am still not sure what you mean. The only thing that needs to be secured is the sub box and I cant figure out how you mean it can be secured form the bumper mounts |
|
| Hi
Would think you could make a bracket to bolt to the bumper mounts inside the boot to help secure the stuff mounted in the boot. You could make it any shape you need. As to Alcantara, I was referring to when covering squarish things where there is a fairly sharp edge. For the door cars I would just suggest using a glue on the back to hold it in place. All the best Keith |
|
| Hi Keith,
can you elaborate on the brackets from the bumper mounts? I don't understand how i can attach them to the bottom of the sub with the amps where they are and how to release and attach it. Are you refering to the sub box or the door cards for the stitching? I have never done upholstery and with regards to the door cards, i was thinking of cutting off the black vinyl and replacing it with alcantera, like this 
I would like the same type of double stiching in the seats, like this 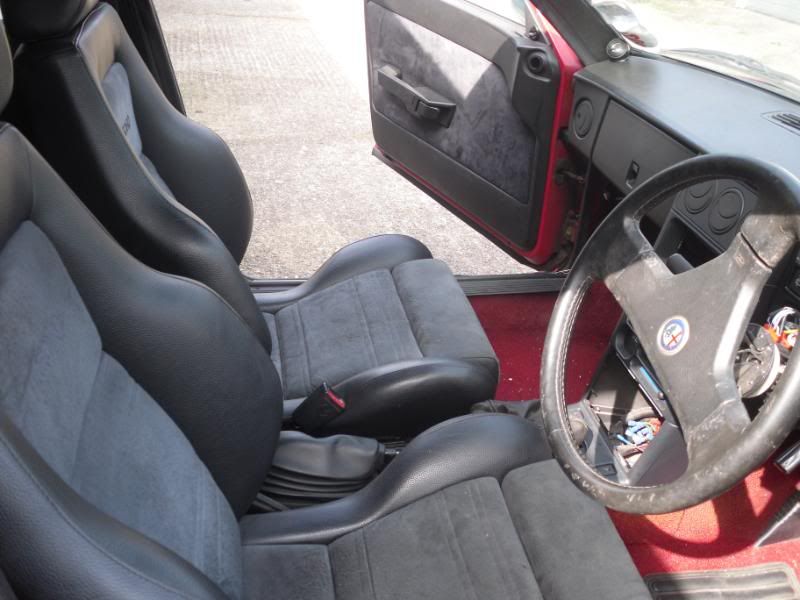
I was thinking of stitching through the alcantera and foam backing onto something like card before sticking this to the door card. |
|
| Hi
For the alcantara, the way it is done on the Maserati on edges is to use 2 pieces, with (I think) the edges stitched together. As to securing it in the boot, think I would be tempted to make brackets which bolt to the bumper mounts. All the best Keith |
|
| I NEED HELP PLEASE
How can I secure the sub box from up and down movement? I was thinking of using a D shaped bolt through pull handle D shaped bolt through stainless steel pull handles - Pull Handles - e-Hardware door handles & furniture on the bottom and then a ratchet strap going through it. Attaching the ratchet and strap to be accessible is my problem. I had another idea to use the locking mechanism found on boots and bonnets of cars, this could be released via a cable as with the boot or bonnet, like this. http://www.skjagtech.co.uk/images/x300-x308-boot-lock/test1.JPG http://www.skjagtech.co.uk/images/x300-x308-boot-lock/test2.JPG I plan on using the original wheel clamp, by drilling a hole through the plywood, to hold it in place and then attach the mechanisms to the plywood held in place by the wheel clamp. I was thinking I could move the sub back to give easier access to the spare wheel and therefore negate the need to remove the false top but as it is, the slot port is loaded about 4 inches from the back of the boot. The reason for this is I was thinking I could remake the plywood base and instead of cutting out the circle I would only cut two thirds of the circle out, so the cut out part can be held in place with the spare wheel clamp. |
|
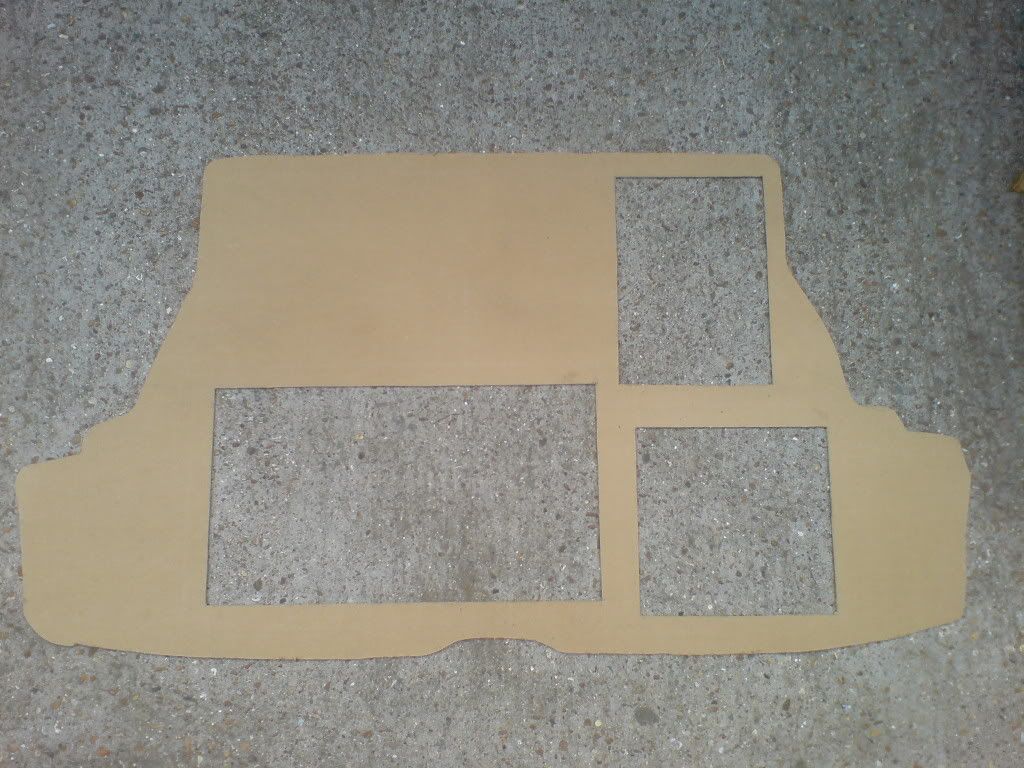
O.K, so first I cut out the hardboard, measured where the amps and sub are going to be and cut out the holes for them.
here you can see where I will place the wood blocks, the sub ones have a 12mm corner cut out, all bar the sub ones will be glued in place, you can see round holes in the top of the blocks, they are for the magnets and 1mm metal strips will be glued onto the underside of the hardboard. 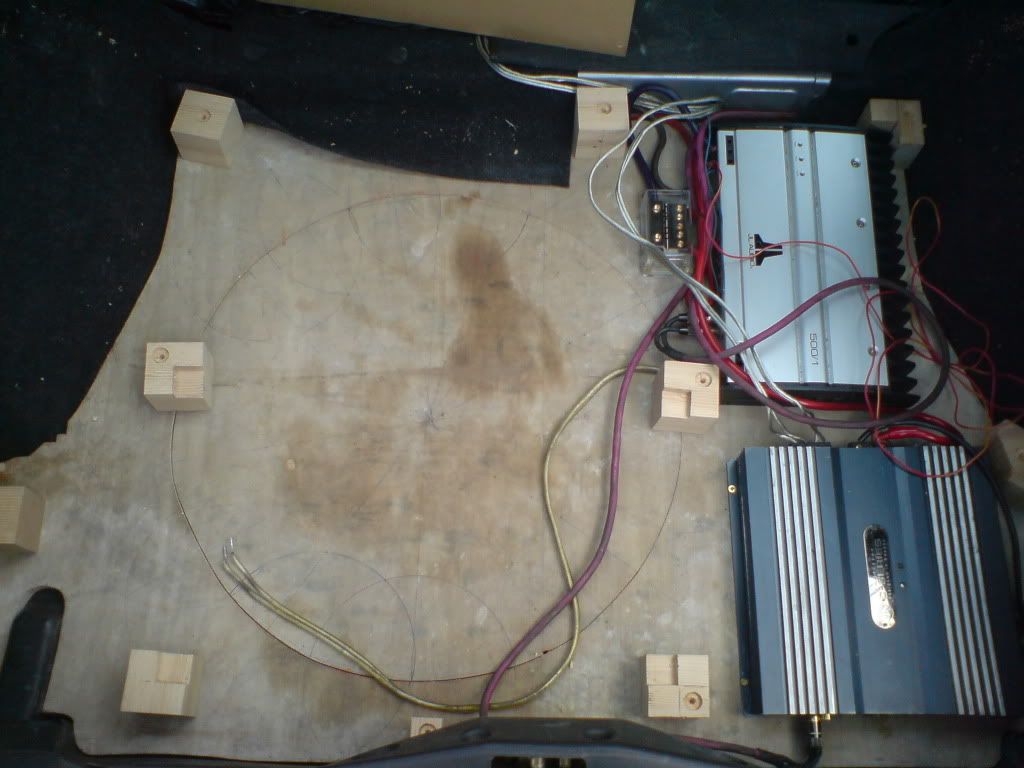
Here is the underside with the sub wood blocks screwed in place 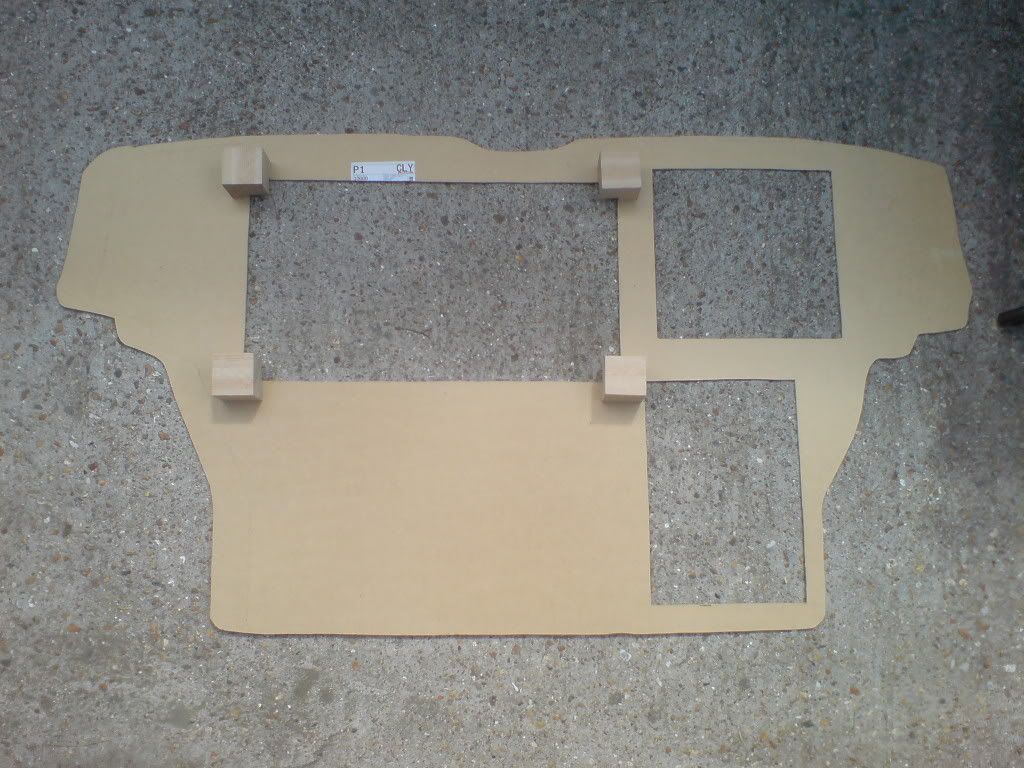
Here is the false top in place, I think I made a couple of rooky mistakes, this is my first install after all. I cut the holes for the amps but didn't take into account that the templates I used are for the base of the amps, not the top. The component amp needs 13.5mm each side to be added but I think I will leave it otherwise heat dispersion might not be as good. On the sub amp 10-12mm could be added on the left side. I say could on both because I plan on having hardboard inner sides to the cut outs where the amps are, I will have to decide how Im going to do it. I also need to raise the component amp to make the top flush. 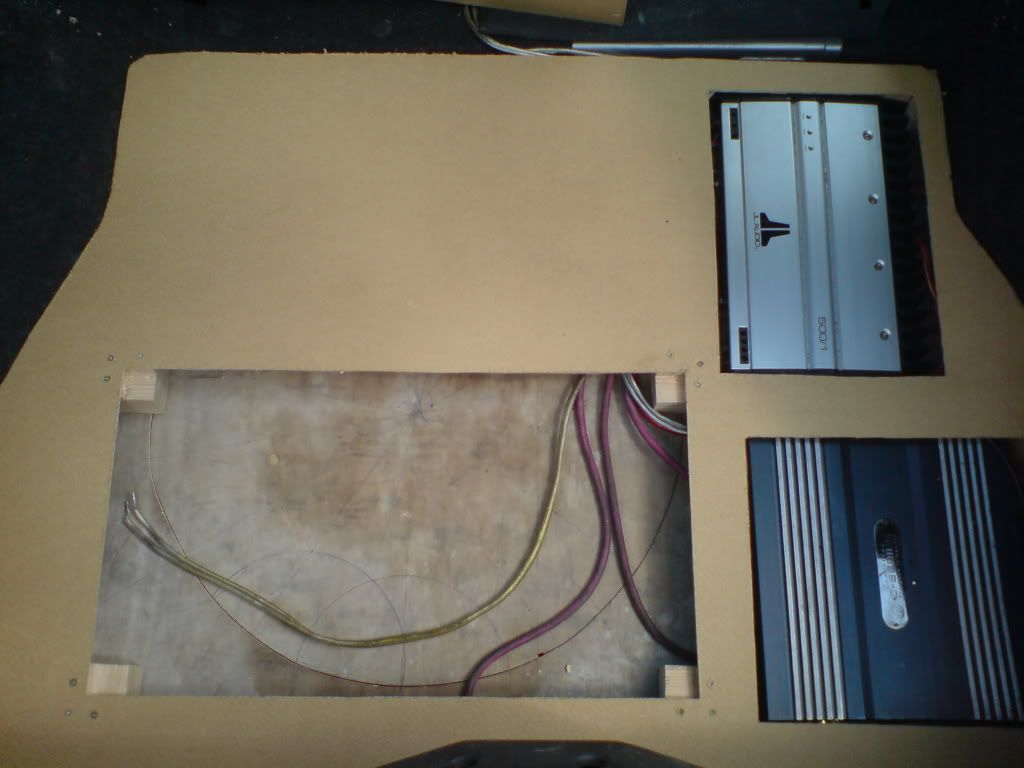
Here you can see the sub pushed in with a tight fit, this is all just a first mock-up, I plan on cutting the hardboard again, using this one as a template, there are 2 places Im not happy with. I say this but it might not me necessary as I need to shave of a mm or two around the edge for the covering material to be able to fit and on the sub cut out, which will be larger as the sub will be covered and the hardboard. 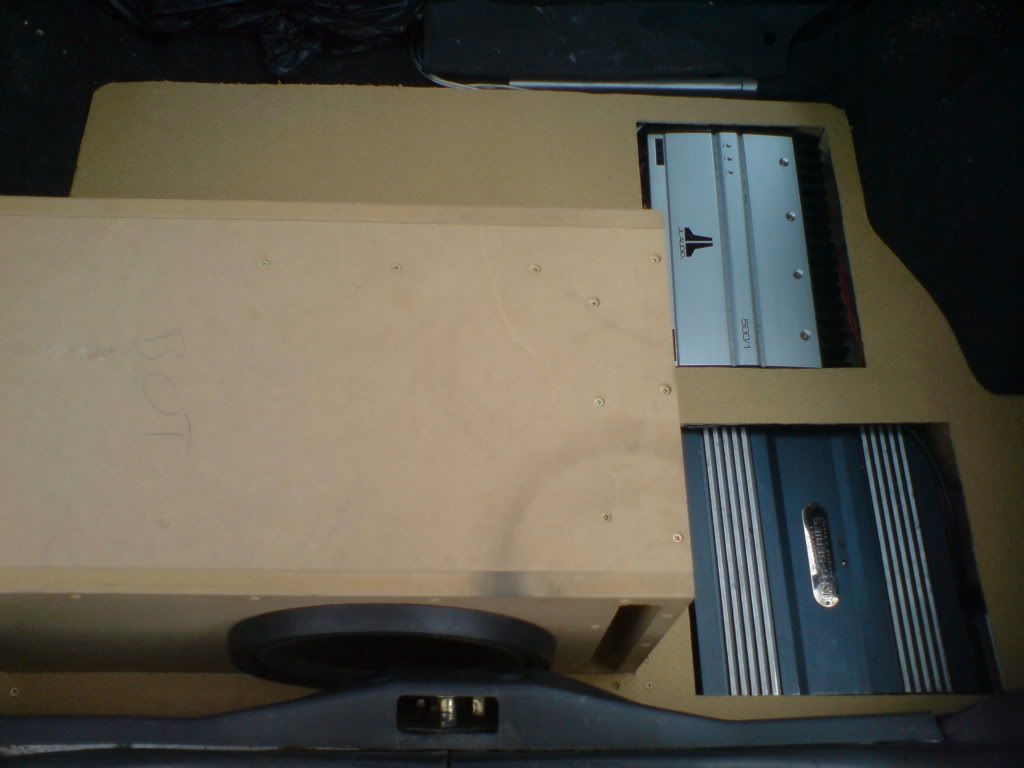 |
|
| I checked out a foam place for backing for the boot floor, very nice lady gave me a contact, as I said I want to upholster the door cards with grey alcantera to match the seats and wanted stitching in it.
I NEED HELP!! What / how should I cover the sub box? I was thinking of rounding the edges and getting alcantara cut slightly bigger than the dimensions and then stitched together, with baseball type of stitching, I could either have the stitching on the outside or turn it inside out. I still plan on having a 10 inch Alfa Romeo emblem embroidered into the alcantera on the top face of the sub, or maybe the JL Audio emblem. Suggestions please |
|
finally got some of my blocks, so i made my template for the hardboard top
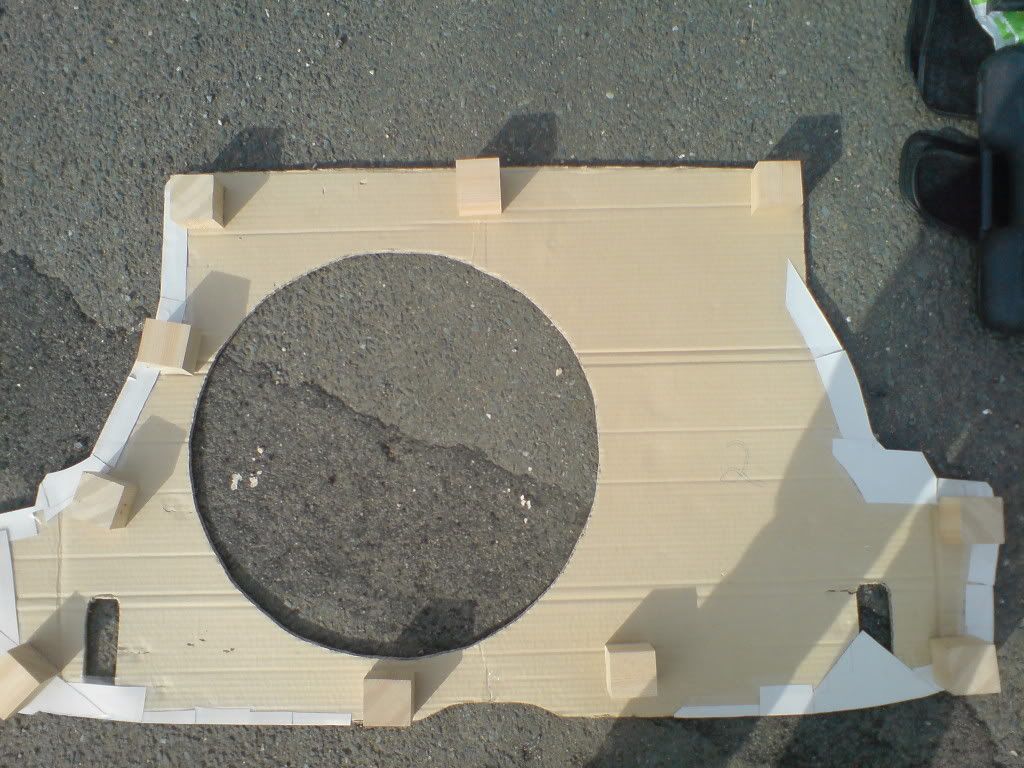
Later today the dremel will come out to cut the hardboard to shape, that should be fun |
|
| Yes some people do for the smaller holes, but i want to do a thorough job and got all the small bits done aswell I saw your post and replied to it but you never replied I plan on cutting the door cards so i can slide it over the mdf rings, as i too dont like the idea of attaching the speakers to the door cards. I get no dimming of head unit and no cutting out, i did get dimming before i set my amp gains correctly. I don't have it loud as the SQ gets harsh from not sealing the doors yet, so the cone moves too freely. |
|
Flippen 'eck! Don't people normally just stick sound deadening mat over these holes? Also, I'm sure I posted in one of your previous car audio threads about the window motors getting in the way of 6.5" speakers in the front centre of the doors. My solution of standoffs was uglier but faster and less drastic: http://www.axys.co.nz/ben/alfa33/33profile/ALLDIALS.JPG It also means I can't anchor the speaker to anything but the door card. I haven't bothered to upgrade the power supply to my head unit so the unit cuts out if the volume's turned way up. I guess the 33's just not designed to rock! |
|||
| Lol, mine was not flat to start, i guess they get soo hot they bend, I had to straighten mine, its still not perfect though |
|
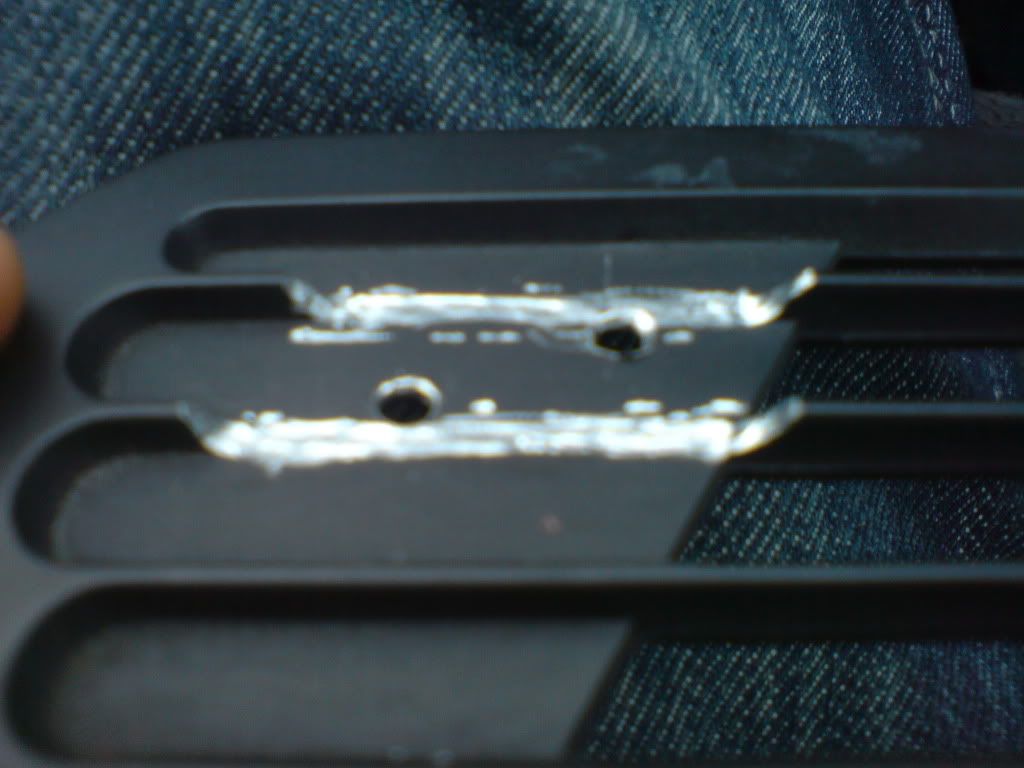
| I wish we'd swapped demister grilles before you attacked your nice flat one with a dremmel! | |
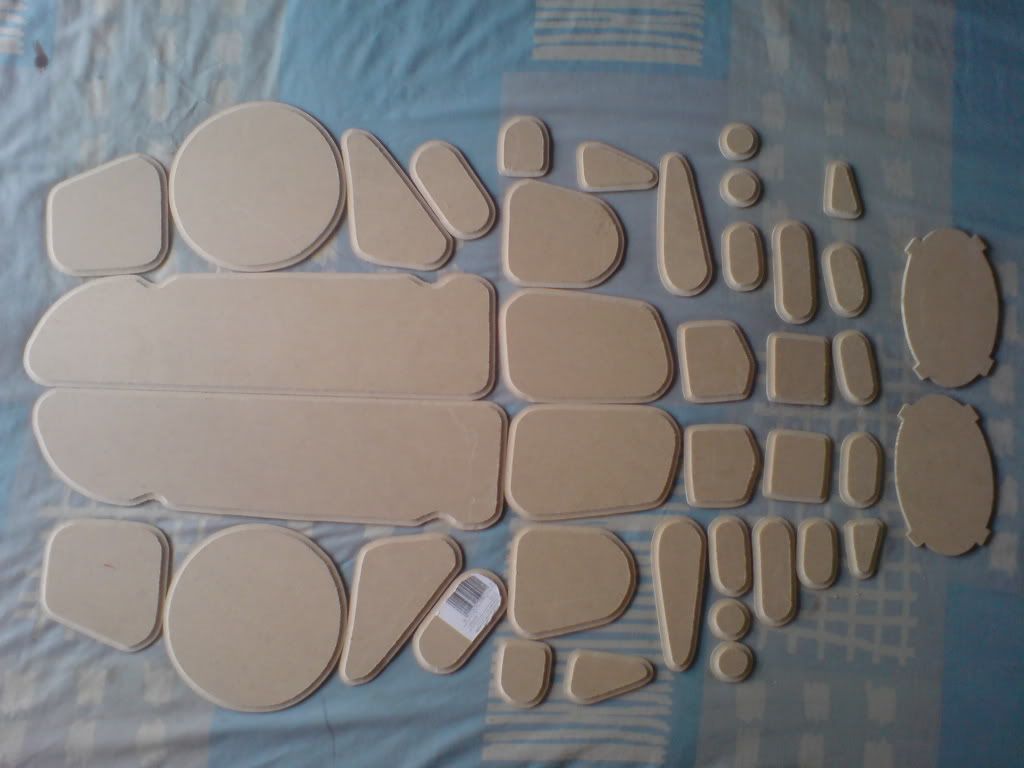
I got my mdf blanking plates today.
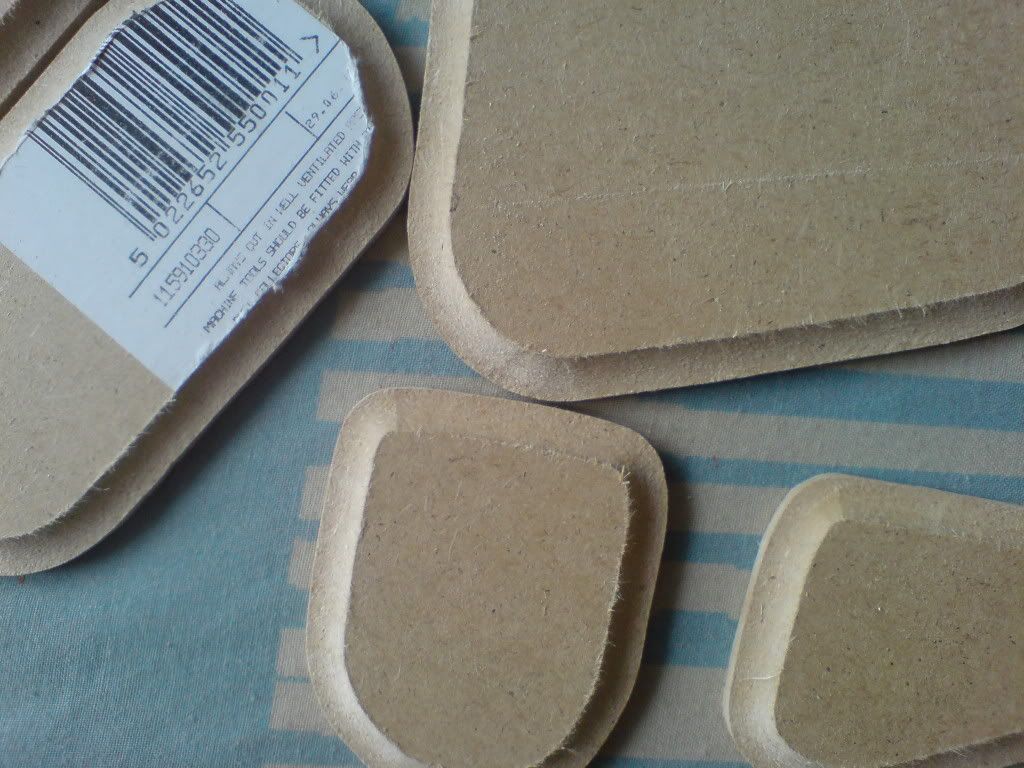
My mate forgot to cut the 60mm blocks for the false floor and should have them done for the weekend. Once there done I can make a new template, from the old one, to make the false floor, get that cut from my hardboard and then get it covered. I need some help deciding on the finish. I was thinking the floor could be black leather, PVC or vinyl and the sub could be grey alcantara with the Alfa Romeo logo embroidered on the top. I will not do anything today as it is windy and is trying to rain |
|
| I have been trying to figure out a way to secure the leather covered hardboard.
I was thinking of using Velcro, but that wont pull together enough to give a flush fit. I also thought that screws through the leather would spoil the look and look nasty, so I thought of using magnets Buy Circular Disc Magnets Online EP310 15mm dia x 2mmA N42 - NiCuNi plated 1.9kg Pack of 20 Magnets. I can countersink 2mm into the 60mm blocks and if the magnets are not strong enough I can double them up and countersink to 4mm. The magnets will be glued in an I can glue some 1mm metal plates on the underside of the hardboard The magnetic field isnt strong enough to affect the amps. Q can you think of any other way? Q what do you think of using magnets |
|
| I got the speaker covers, they are 10mm deep and make the overall look too high, so i will remove an mdf rind once i have dremmeled off the top lug for the regulator or moved it. | |
I got the dremel out
 |
|